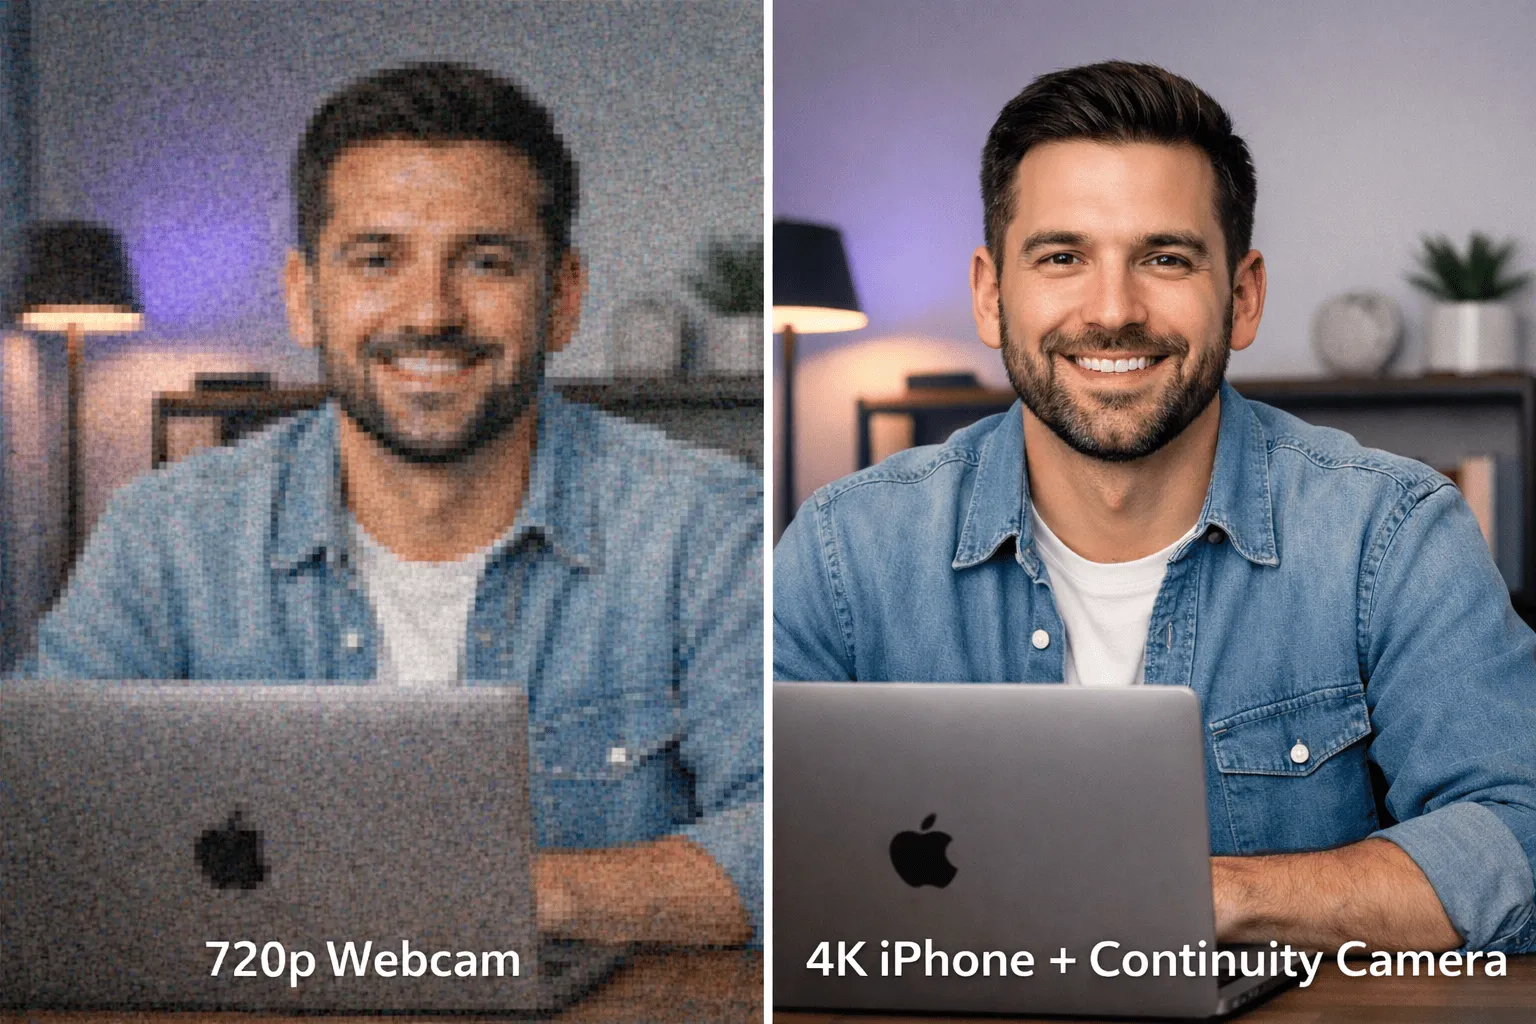
If you’ve ever wondered why your $2,000 MacBook produces video that looks like a 2007 Skype call, you’re not alone. The truth is, Apple prioritizes thinness over camera quality. But here’s the secret: you already own the solution. This guide builds on real-world transformations and addresses every common pitfall to get you from grainy to gorgeous with zero new purchases.
The Harsh Reality: Why Your Mac’s Webcam Disappoints
Let’s rip off the band-aid: most MacBooks (even recent ones) ship with 720p or 1080p webcams. In dim lighting, these tiny sensors produce that grainy, muddy look you see in your recordings. It’s not broken - it’s just physics.
The workaround? Your iPhone’s rear camera system. It’s not just better; it’s exponentially better - larger sensor, better processing, and superior low-light performance. Apple built a feature called Continuity Camera specifically for this, and it’s hiding in plain sight.
The iPhone Webcam Hack: Continuity Camera Deep Dive
The Magic Trick (Wireless Method)
Requirements:
- iPhone XR or later (running iOS 16+)
- Mac running macOS Ventura or newer (Sequoia recommended)
- Both devices on same Apple ID, with Bluetooth and Wi-Fi enabled
Setup in 30 seconds:
- Open your recording app (FaceTime, QuickTime, Zoom, etc.)
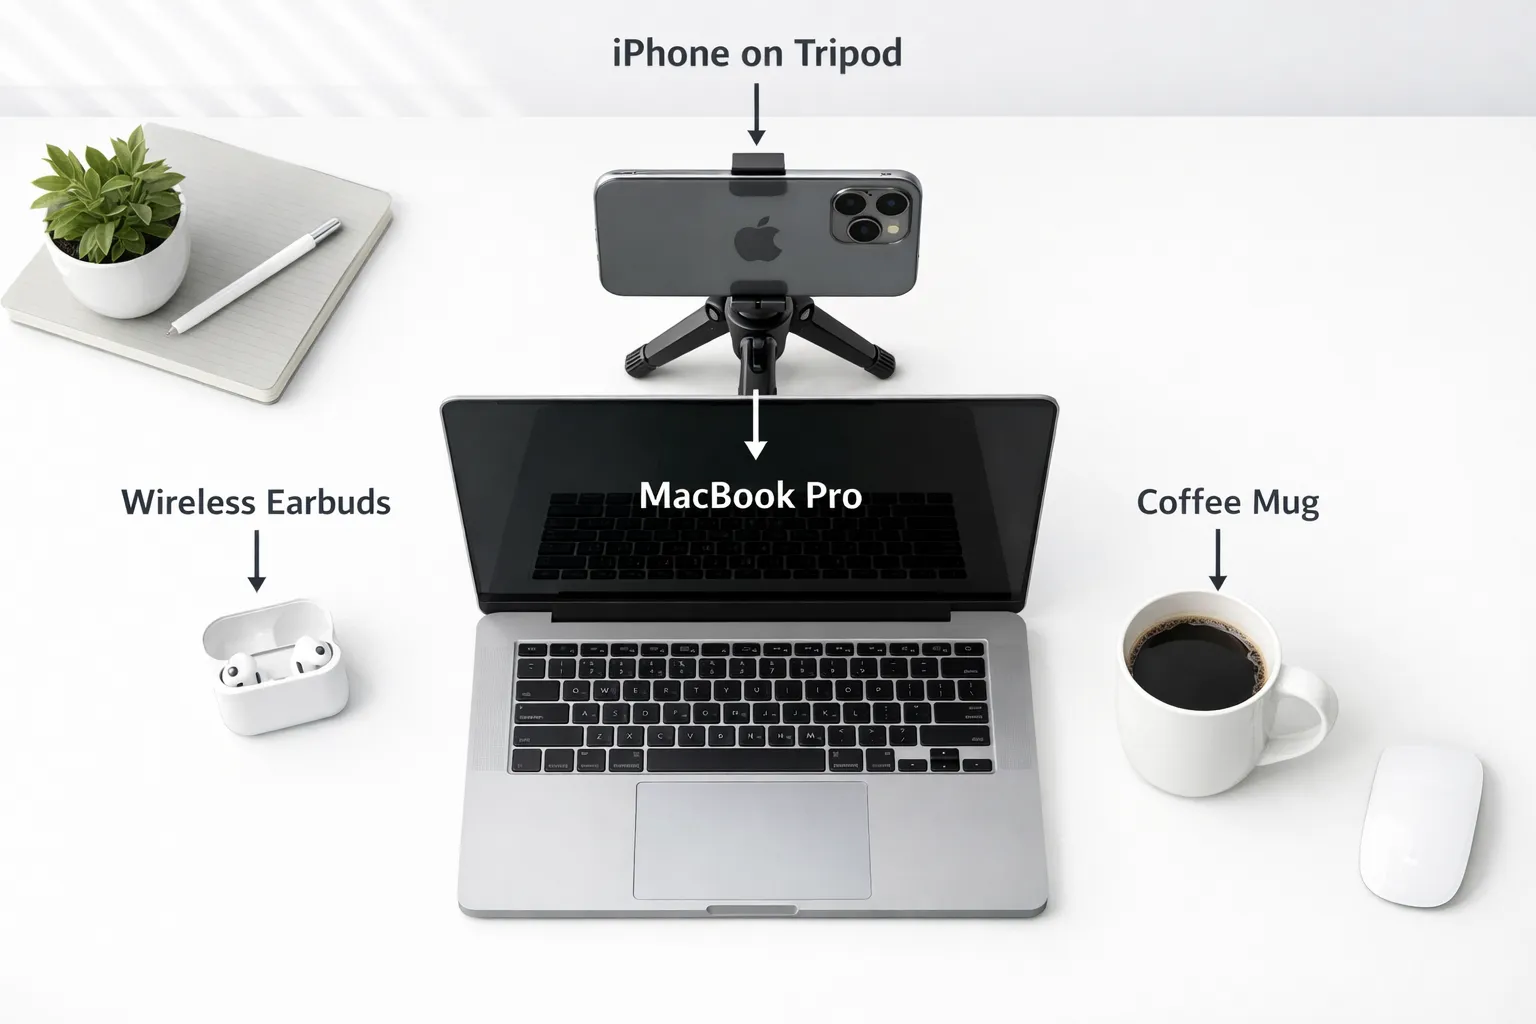
- Physically bring your iPhone close to your Mac (or mount it above your screen)
- Your Mac will auto-detect the iPhone and show it as a camera option
- Select it. That’s it.
For click-by-click Photo Booth and QuickTime steps, and how to get your face and your screen into one video, see how to record yourself on a Mac or MacBook.
Mounting tips:
- Lock your iPhone first (prevents interruptions)
- Use a $10 phone tripod or even a coffee mug to prop it up
- Ensure the rear cameras face you, not the selfie cam
- Landscape orientation matches your screen aspect ratio
When It Fails: The Troubleshooting Checklist
“My iPhone doesn’t show up as a camera option”
- Mac Studio/Mac mini users: You must connect via USB cable first to “pair” the device. Once it’s active in an app, you can unplug and continue wirelessly
- Privacy alert: On your iPhone, go to Settings > General > AirPlay & Handoff and ensure “Continuity Camera” is enabled
- Force detection: Open QuickTime Player > File > New Movie Recording. Click the dropdown arrow next to the record button and manually select your iPhone
- Nuclear option: Restart both devices. Seriously, this fixes 90% of Continuity issues
“The video is still blurry or noisy” Even iPhone cameras need light. Continuity Camera will look terrible in a dark room.
- Face a window or place a lamp 3 feet in front of you
- Avoid backlighting (don’t sit with a window behind you)
- Clamshell mode trick: Some users report better wireless stability when the MacBook lid is closed. Try recording with an external monitor
“I want a wired connection for reliability”
- Plug your iPhone directly into your Mac with a USB cable
- In QuickTime, select it as both camera and microphone source
- This eliminates Wi-Fi interference and is bulletproof for long recordings
Camera Positioning: The Authority Angle
The 6-Inch Rule That Changes Everything
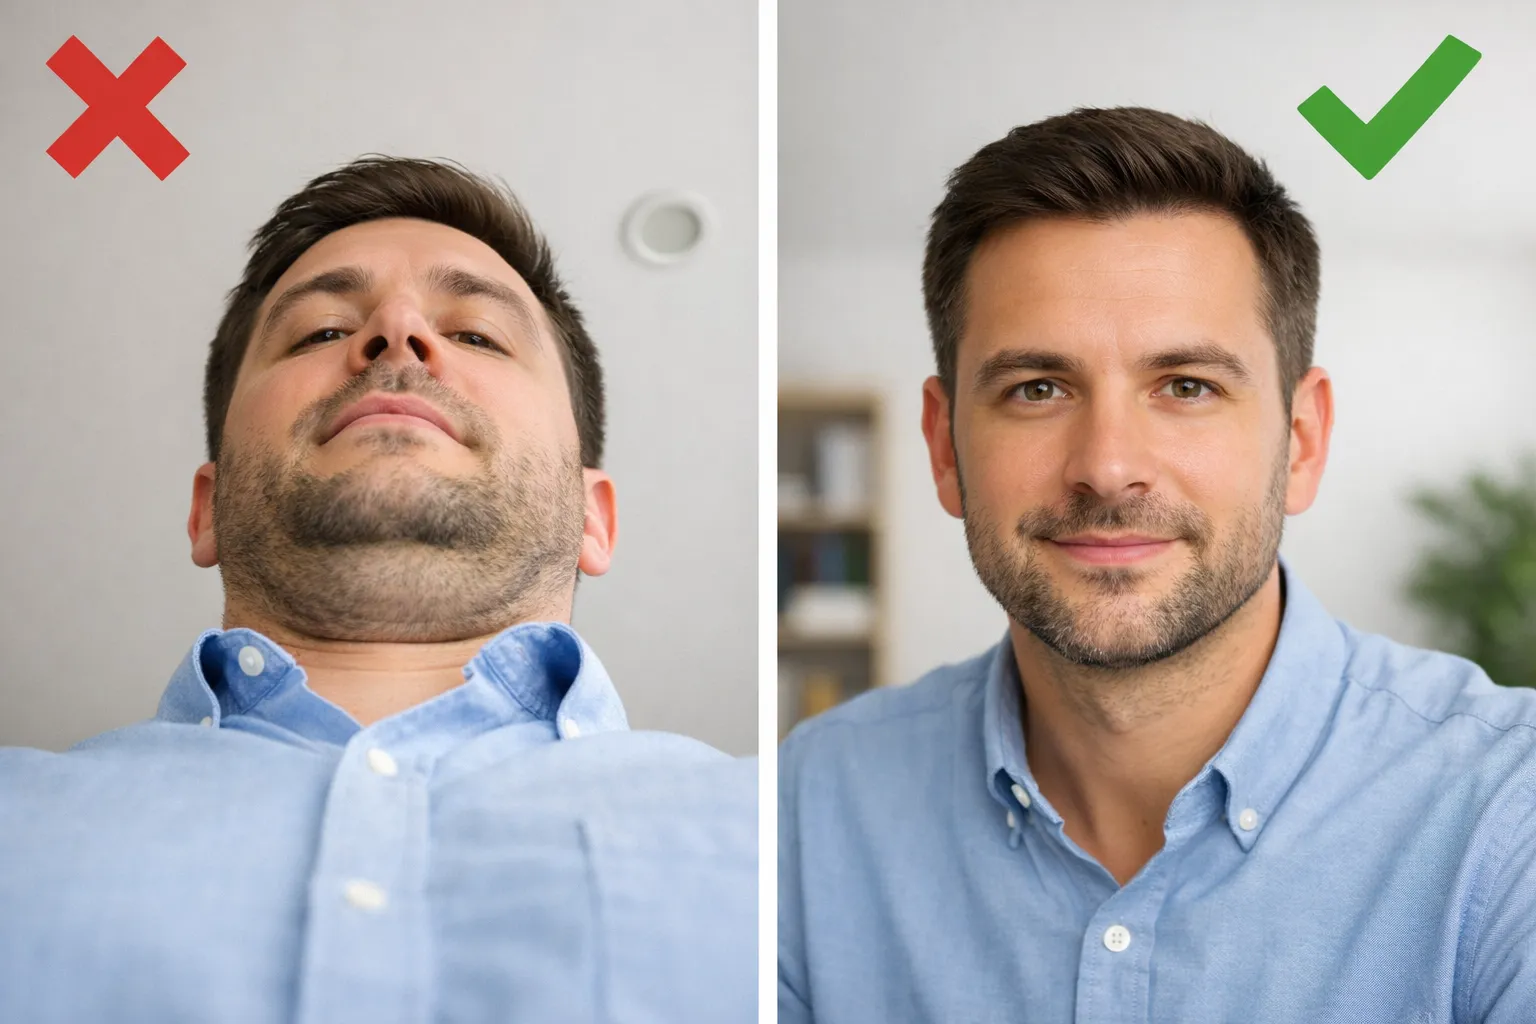
Your camera must be at eyebrow height. Not chin height. Not nose height. Eyebrow height.
The test: Open Photo Booth (yes, that old app). If you can see your ceiling, you’re too low. If you’re looking down at the camera, you’re too high.
The fix:
- Stack books under your laptop (start with 6 inches, adjust up)
- Use a laptop stand or even a sturdy box
- Angle the screen slightly down toward you
Result: You look confident and direct, not submissive. Bonus: it hides that messy shelf behind you.
The Ideal Setup (Visual Guide)
[iPhone on tripod, 6-12 inches above monitor]
        |
        | ← Your eyes look here (camera lens)
        |
[Your face, 2-3 feet from screen]
        |
[Laptop on stand/books]
        |
[Desk lamp pointing AT WALL in front of you]
Lighting: The $0 Studio Glow
The Bounce Technique (No More Shiny Forehead)
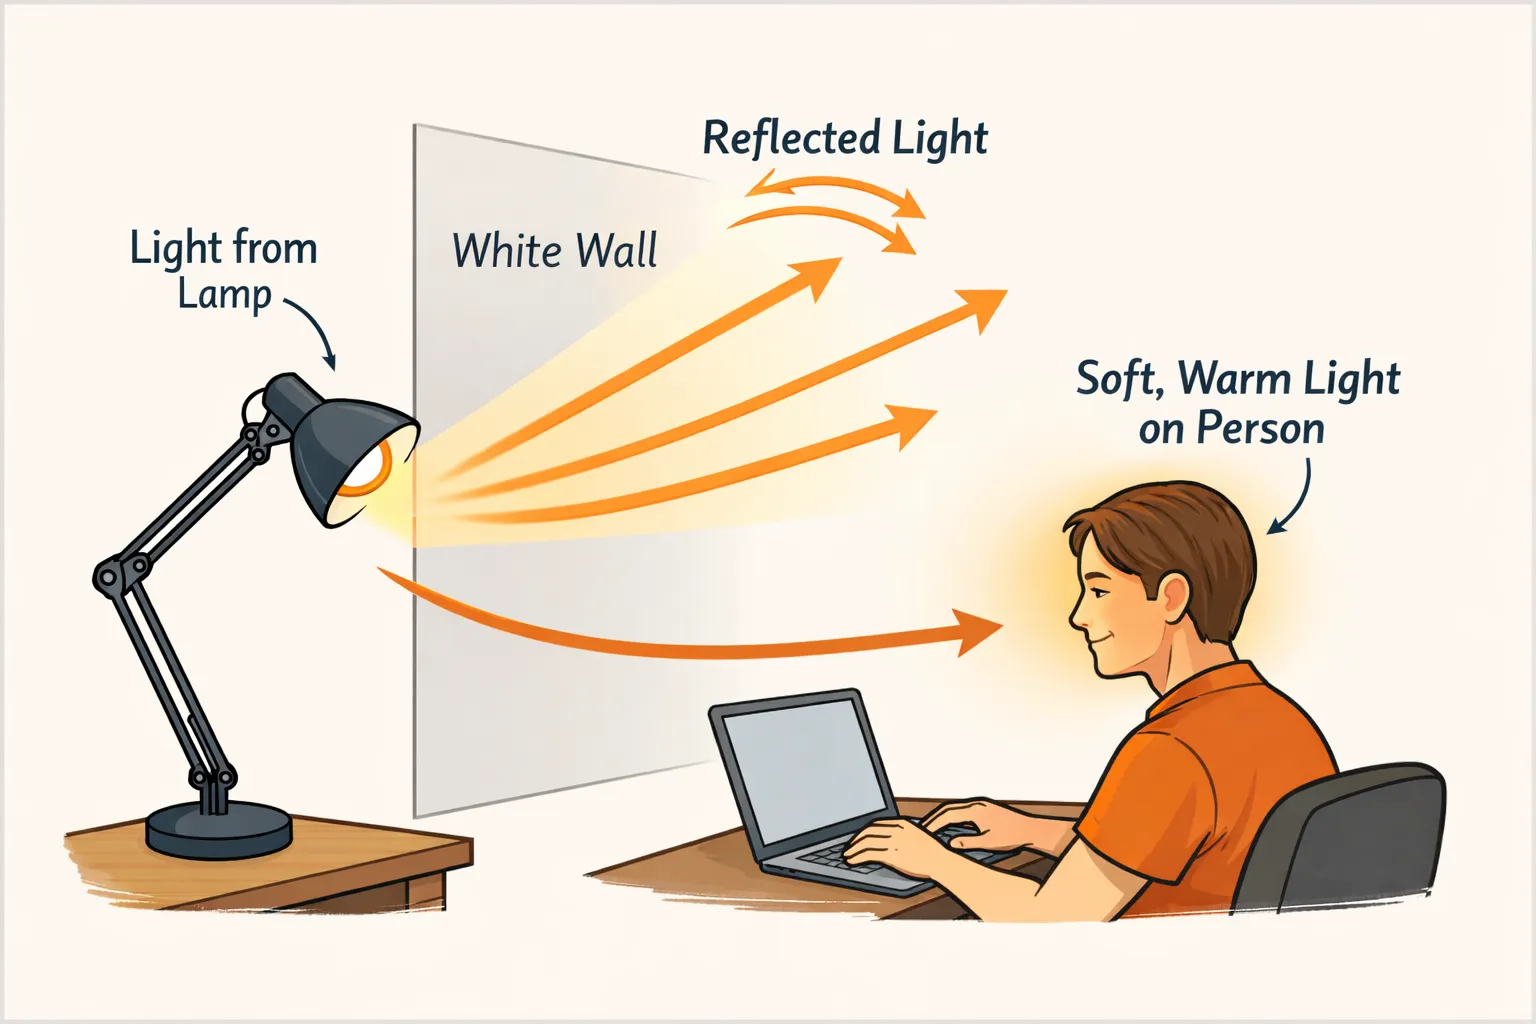
Direct light creates harsh shadows and makes you sweat on camera. Instead:
- Grab any desk lamp you own
- Point it at the wall in front of you (behind your laptop)
- The light bounces back as a soft, diffused glow
- Position the lamp slightly left or right for gentle shaping
Why this works: It’s a poor man’s softbox. The wall becomes a giant, even light source.
Lighting Mistakes That Ruin Video
❌ Backlighting: Window behind you = silhouette face
❌ Overhead only: Ceiling lights cast shadows under your eyes
❌ Screen as only source: Makes you look blue and sickly
✅ Fix: One lamp, bounced off a wall, positioned at 45° to your face
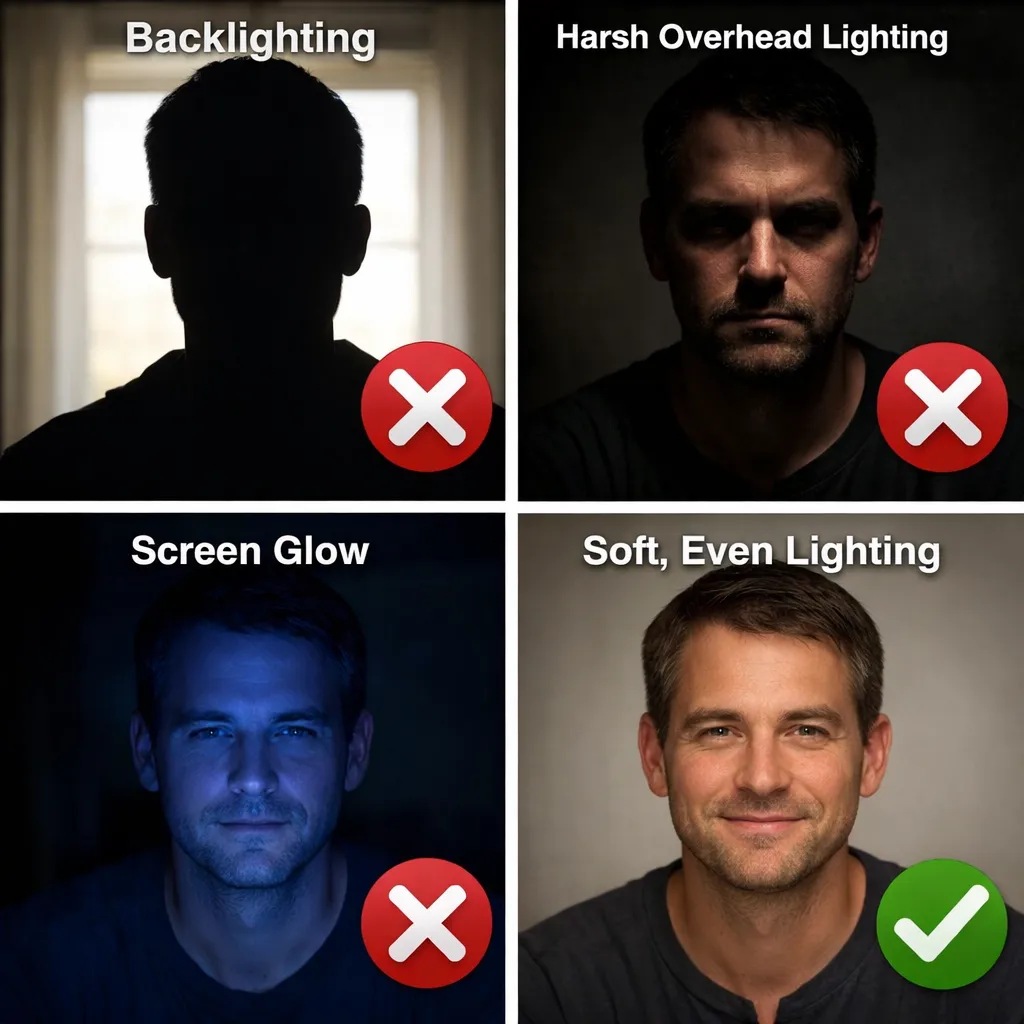
Pro tip for glasses wearers: Place the lamp higher than your eyes and to the side. This prevents reflections of the bulb in your lenses.
Audio: The Proximity + AI Combo
The Golden Rule: Closer is Better
Your voice sounds richer when the mic is near your mouth. Period.
- Best free option: Wired headphones (old Apple EarPods, any 3.5mm headset)
- Best wireless option: AirPods Pro if you enable Voice Isolation (see below)
- Avoid: Laptop mic at all costs - it’s 3 feet away and picks up everything
Voice Isolation: The macOS Superpower
Hidden in macOS Big Sur and later, this AI filter is better than most hardware solutions.
How to enable:
- Start recording or join a call
- Click the Control Center icon (the two switches) in your Mac’s menu bar
- Click Mic Mode and select “Voice Isolation”
- It works system-wide in most apps (QuickTime, Zoom, etc.)
What it does: Uses machine learning to eliminate room echo, fan noise, keyboard clacks, and that “hollow” sound. Your voice sounds like it’s coming from a treated studio.
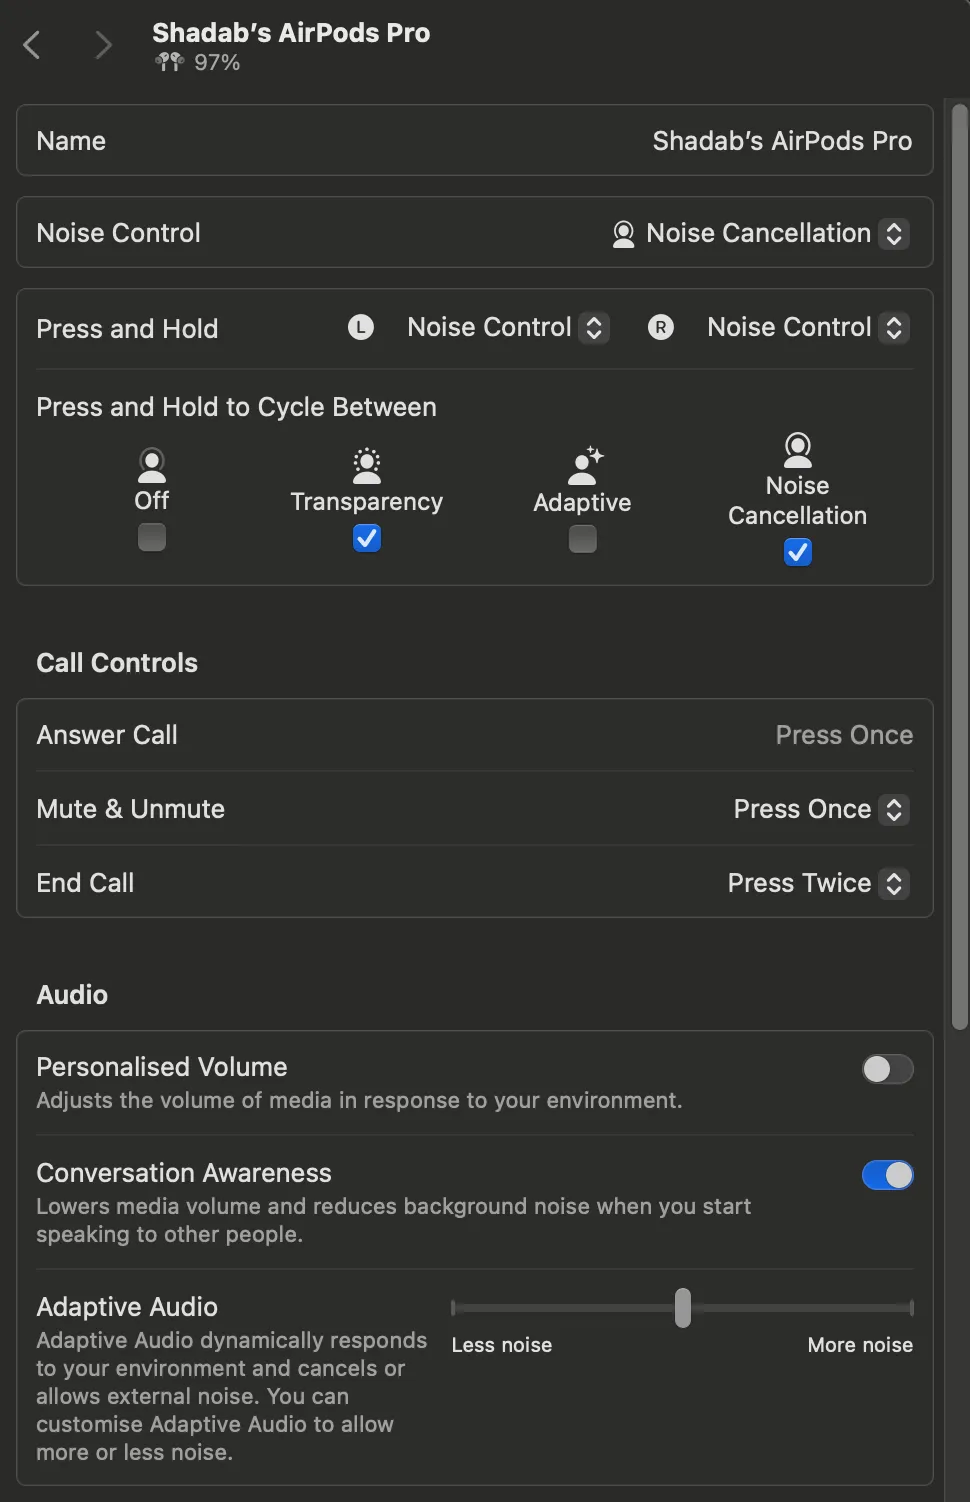
The AirPods Latency Warning
Critical: Bluetooth headphones introduce audio delay. If you’re recording screen demos where you click and talk simultaneously, your audio will be out of sync.
Solutions:
- Use wired headphones for perfect sync
- Record audio separately and sync in post (painful, don’t do this)
- Accept the lag and trim in editing (QuickTime can adjust sync by ±0.5 seconds)
Recording System Audio (The Hidden Trick)
On macOS 27 or later, Cmd+Shift+5 can record your Mac’s system audio: click Options and choose Include System Audio (Apple Support, published 14 September 2026, checked 6 October 2026).
On macOS 26 and earlier, QuickTime and Cmd+Shift+5 cannot record your Mac’s system audio. They only capture mic input.
Free workaround for macOS 26 and earlier - Background Music:
- Install “Background Music” (free on GitHub or via Homebrew)
- It creates a virtual audio device
- In QuickTime’s recording options, select “Background Music” as the microphone
- Now it captures both system sounds and your voice
Important: Use headphones to prevent feedback loops.
The All-in-One Alternative: CursorClip
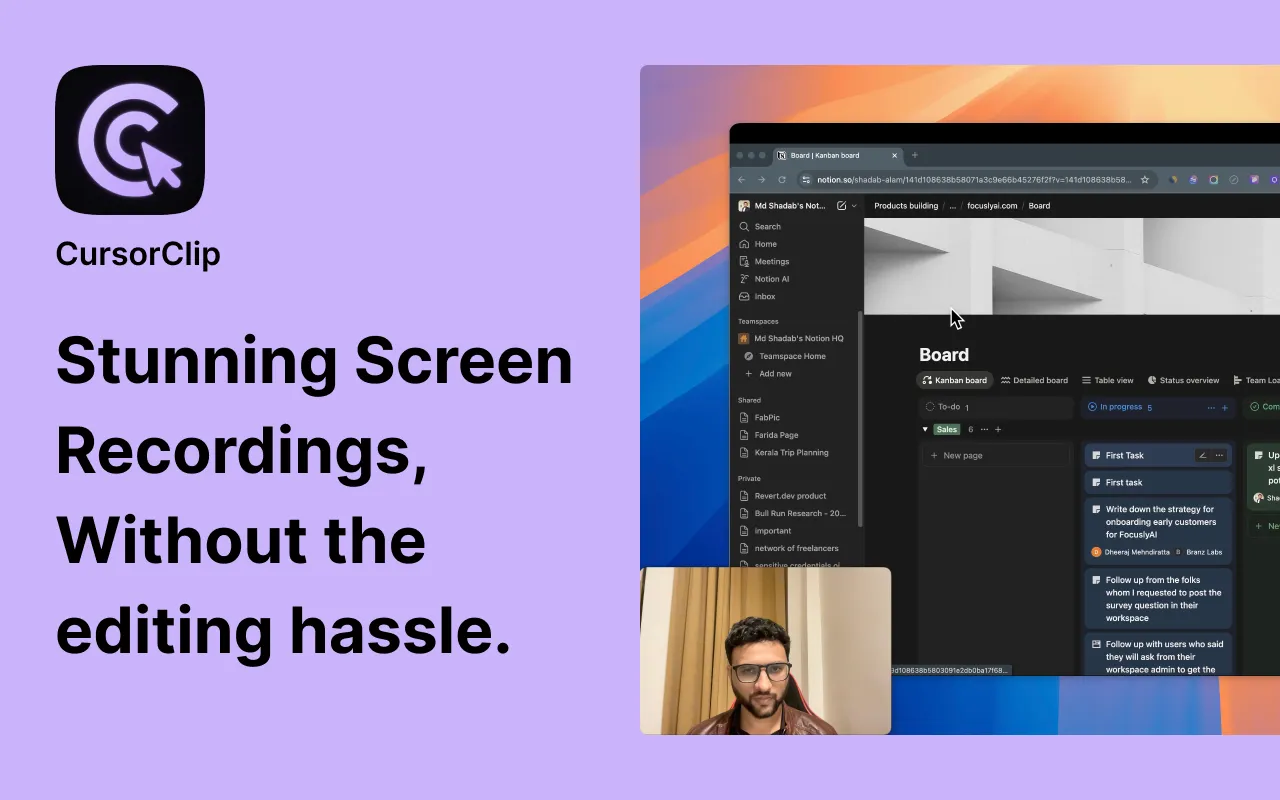
If juggling Background Music, Continuity Camera, and QuickTime feels like too many moving parts, there’s a simpler path. CursorClip handles everything in one app:
- System audio + microphone + webcam - all recorded together, no virtual audio devices needed
- Auto-zoom on cursor - your clicks and movements are automatically highlighted
- Built-in webcam overlay - position your face anywhere on screen
- Instant polish - smooth animations and professional output without editing
It’s designed specifically for product demos, tutorials, and walkthroughs where you want that “produced” look without touching a video editor. At ~$70 one-time, it pays for itself after your first client demo.
Background & Framing: The Invisible Polish
The Blur vs. Clean Wall Debate
After raising your camera, you might only see a wall. That’s perfect. A plain wall is better than a messy room.
If you still see clutter:
- Software blur: Enable “Portrait Mode” or “Background Blur” in your recording app (Zoom, Loom, etc.)
- DIY backdrop: Hang a blanket or use a bookshelf as a textured background
The curtain exception: If you have a curtain like our case study, it’s fine as texture. Just ensure it’s evenly lit and not the focal point.
Software Showdown: Pick Your Weapon
| Tool | Cost | Best For | Key Features |
|---|---|---|---|
| QuickTime Player | Free | Simple screen + cam recordings | Built-in, no install, basic editing |
| Cmd+Shift+5 | Free | Quick screen captures | System-wide shortcut, mic selection |
| OBS Studio | Free | Advanced streaming/recording | Multi-source, scenes, free but steep learning curve |
| CursorClip | ~$70 | Polished product demos | Auto-zoom, system audio + mic + webcam in one, no editing needed |
For quick recordings: QuickTime + Continuity Camera gets the job done.
For polished product demos: CursorClip eliminates the need for virtual audio devices, separate webcam apps, and post-production - everything records together with automatic cursor tracking and smooth animations.
Looking for more options? Check out our roundup of the 13 best screen recorders for Mac or explore Screen Studio alternatives if you’re comparing professional tools.
The “It Still Doesn’t Work” FAQ
Q: My Continuity Camera video is still blurry.
A: Clean your iPhone lens. Seriously. Then add more light. If wireless, try USB cable.
Q: Voice Isolation makes my mic too quiet.
A: Go to System Settings > Privacy & Security > Microphone. Revoke and re-grant access to your app. Restart CoreAudio by killing it in Activity Monitor.
Q: My AirPods audio is out of sync.
A: Expected behavior. Use wired headphones or record audio with iPhone’s mic instead.
Q: I disabled Continuity Camera but it keeps popping up.
A: On iPhone, go to Settings > General > AirPlay & Handoff and toggle it off when not needed.
Q: My Mac’s built-in mic suddenly records very quietly.
A: This is a known bug after screen recordings. Revoke mic permissions (System Settings > Privacy & Security > Microphone), restart, and re-grant.
The Enhanced “Record Ready” Checklist
Before you hit record, run this 10-point checklist:
- Camera: iPhone mounted at eyebrow height, locked, rear cameras facing me
- Connection: Wireless (or USB if Mac Studio/mini or connection issues)
- Test: Open Photo Booth to verify angle and framing
- Lighting: Lamp pointed at wall 3 feet in front of me, not direct
- Audio: Wired headphones plugged in (or AirPods with Voice Isolation)
- Mic Mode: Voice Isolation enabled in Control Center
- Background: Blur enabled or only plain wall visible
- System Audio: Include System Audio on (macOS 27+), or Background Music virtual device selected (macOS 26 and earlier)
- Eye Contact: For intros/outros, look at iPhone lens, not screen
- Distractions: iPhone is in Do Not Disturb, Mac notifications silenced
Final Truth: Stop Tweaking, Start Publishing
You now have a setup that rivals $500+ gear investments. The difference between your first grainy attempt and your final recording will be night and day.
The last 1%: Practice looking at the camera lens during direct addresses. It feels alien but creates intimacy. Record 30 seconds, watch it back, adjust one thing. Repeat.
Your audience doesn’t care about perfection. They care about clarity - both visual and mental. A crisp video with clear audio lets your message shine through.
Now close this tab, open QuickTime, and hit record. Your first subscriber is waiting.
P.S. If you found this helpful, the best “minimal effort” improvement you can make next is to record 10 videos. Technique comes from repetition, not from reading another guide.
Related Guides
- Mastering Mac Screen Recordings: The Complete Guide to Intelligent Zooming - Learn how auto-zoom transforms boring screen captures into engaging content
- 13 Best Screen Recorders for Mac - Compare all the major tools in one place
- Best Video Editors for macOS Beginners - If you need to edit your recordings after capture
- Top Screen Studio Alternatives - Exploring professional screen recording options
- How to Record Yourself Presenting a PowerPoint on Mac - Your webcam, your voice and your slides in one video, from PowerPoint, Keynote or Google Slides