Editing Project · How-to · New in 2.2.0
Blur or hide part of your screen
Spotted an email address, an API key or a customer's name in a recording? You don't need to record again. Draw a box over it in the editor and it's hidden in the preview and in everything you export.
Blurs are drawn into the recording itself, before zooms, layouts, crop and Vertical. None of them can show what's underneath.
Add a blur
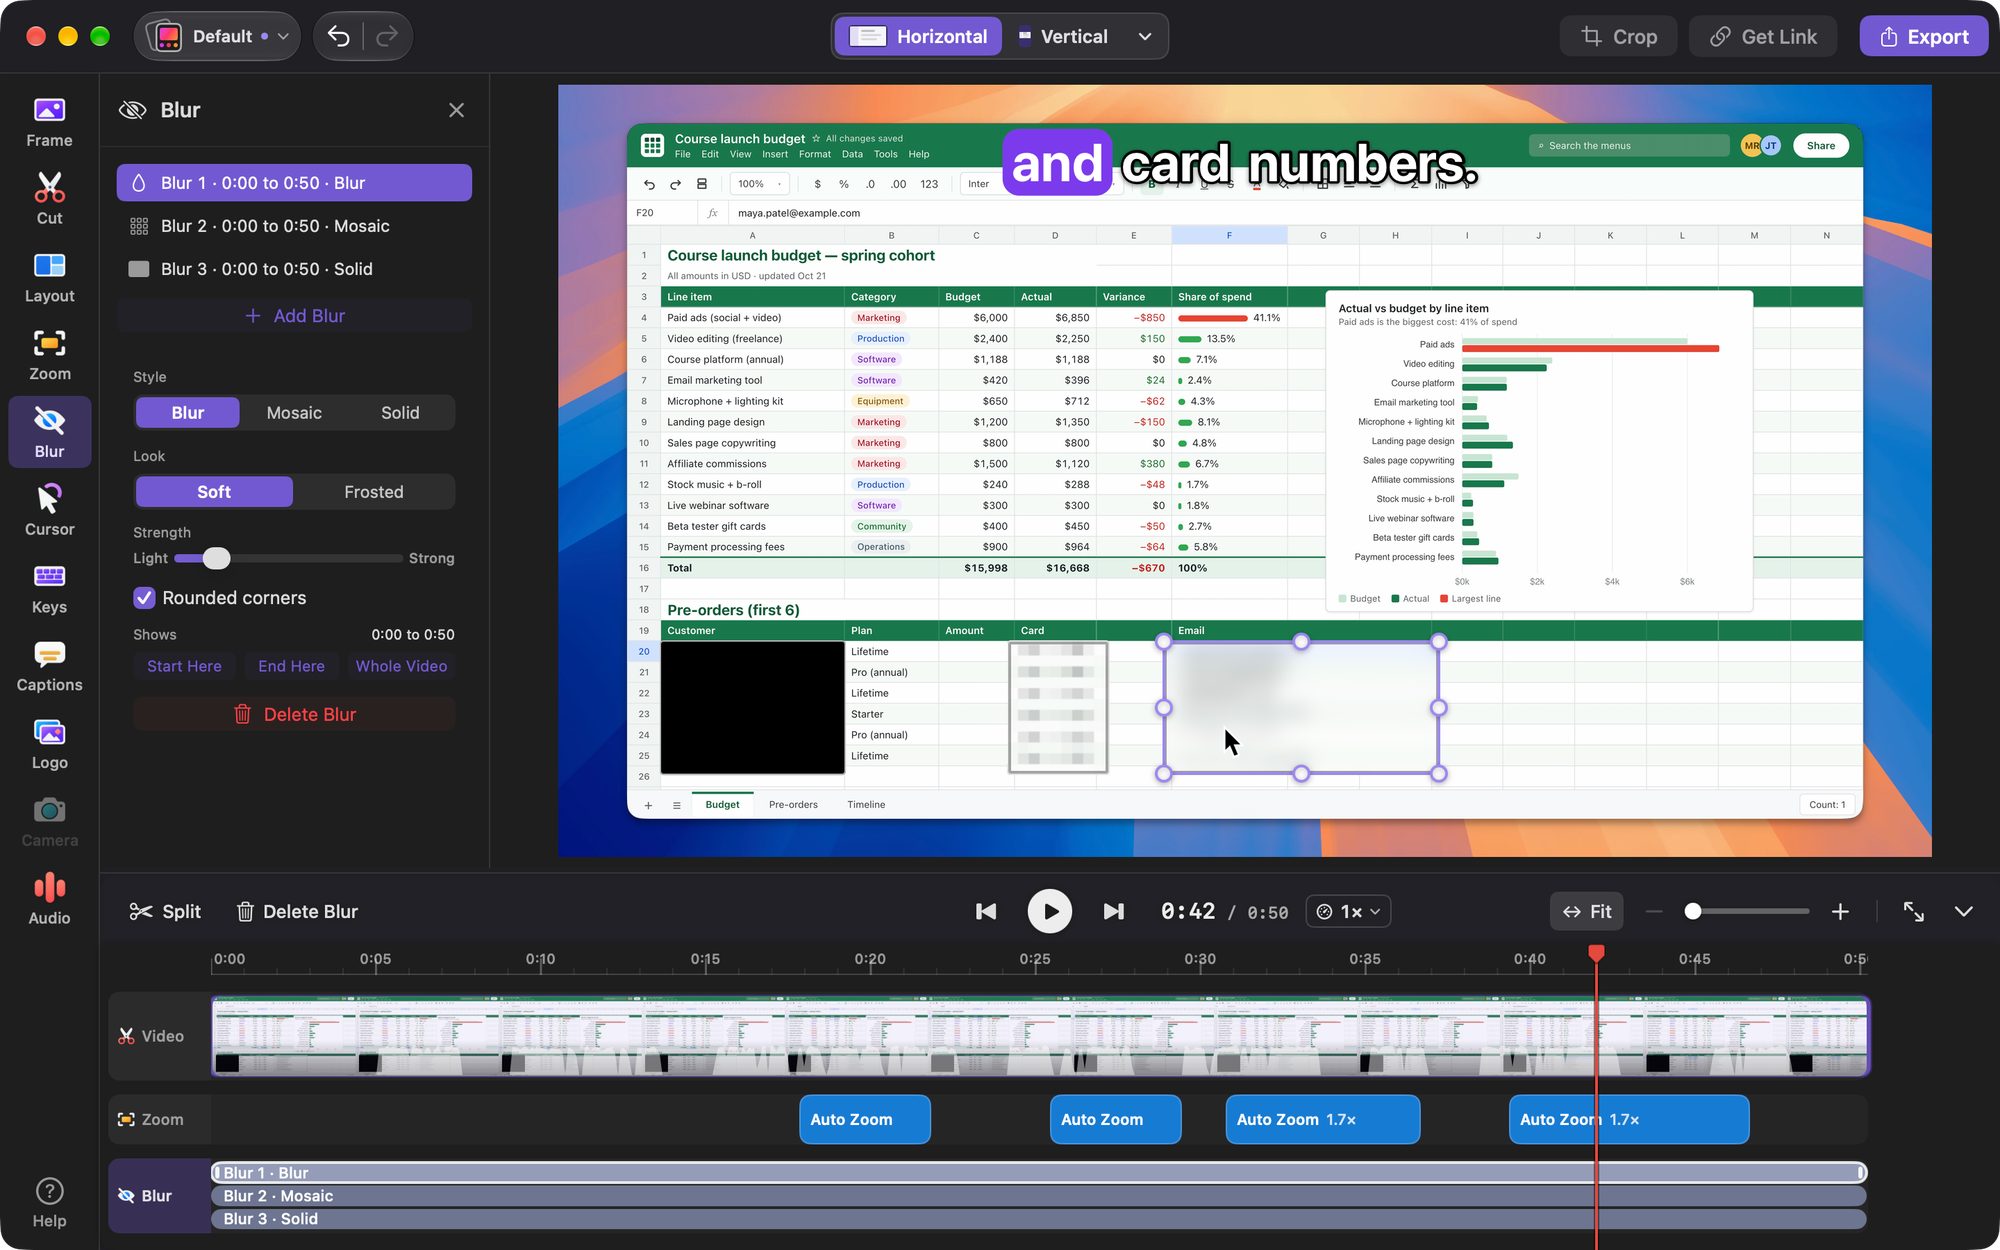
The panel's first line says what to do: pause where it shows, then drag over it on the video.
- 1
Open Blur
In the column of tools on the side of the editor, click Blur. It's right under Zoom, its icon is an eye with a line through it, and its tooltip says Privacy & Blur. The panel that opens is called Blur.
- 2
Pause where the thing shows
Move the playhead to a moment where the email, key or name is on screen. If the video is playing when you press on it, it pauses first, so the box lands on the frame you see. Zooms stay off on this page, so the preview shows the whole screen.
- 3
Drag over it on the video
Press on the video and drag a box over what you want hidden. Or click Add Blur in the panel, which puts a box in the middle of the video. A new blur covers the whole video until you change its time.
- 4
Move or resize it
Drag inside the box to move it. The selected box has eight round handles: drag one to resize from that edge or corner. A box can't be smaller than 8 points on a side.
- 5
Pick a style
Under Style, choose Blur, Mosaic or Solid. The settings for that style appear below it (see the table). For something sensitive, turn the setting up to hide more.
- 6
Set when it shows
Shows lists the blur's time, like 0:00 to 4:12. Move the playhead and click Start Here or End Here to trim it, or Whole Video to cover everything again. You can also drag its block on the Blur lane.
- 7
Play it back, then export
Play the part through and check every frame is covered. The preview draws blurs the same way the export does.
Blur, Mosaic and Solid
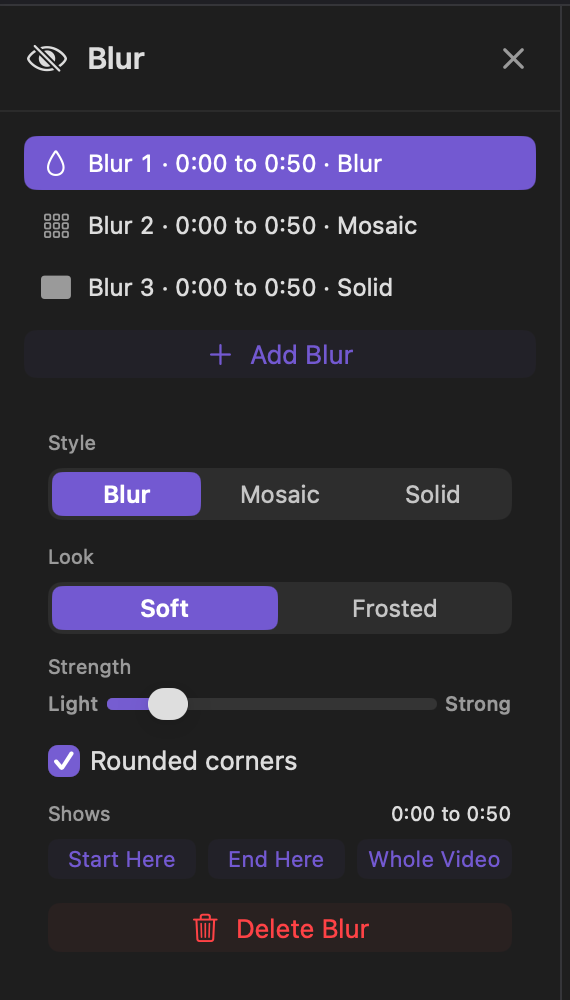
Each blur has its own style. Select it in the list or on the video, then change it in the panel.
Blur
Look: Soft or Frosted. Strength: a slider from Light to Strong.
Soft, the default, keeps the page's own colors and darkness. Frosted adds a light veil, like a macOS window. Turn up Strength to hide more.
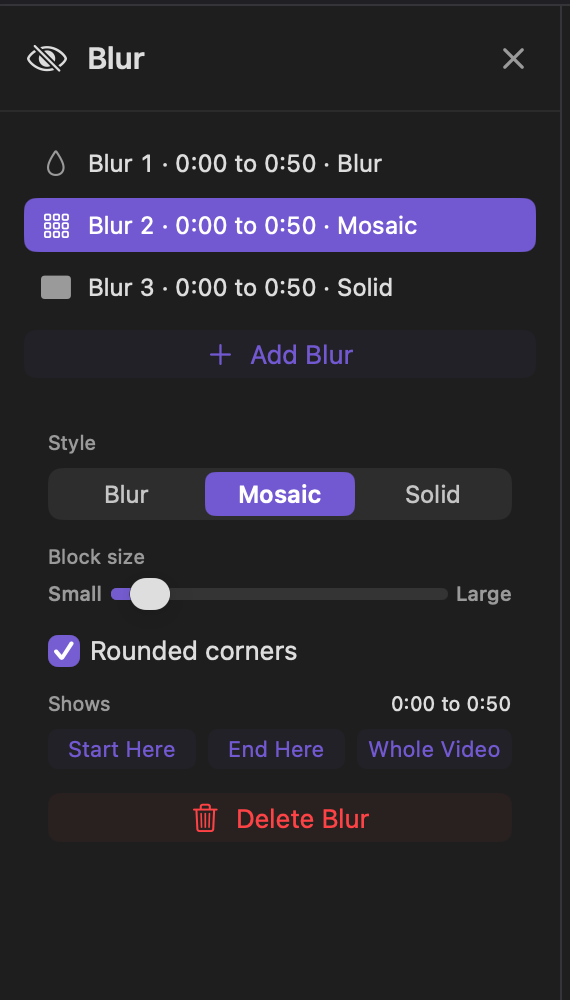
Mosaic
Block size: a slider from Small to Large.
Turns the area into squares. Block size sets how big they are. Bigger squares hide more.
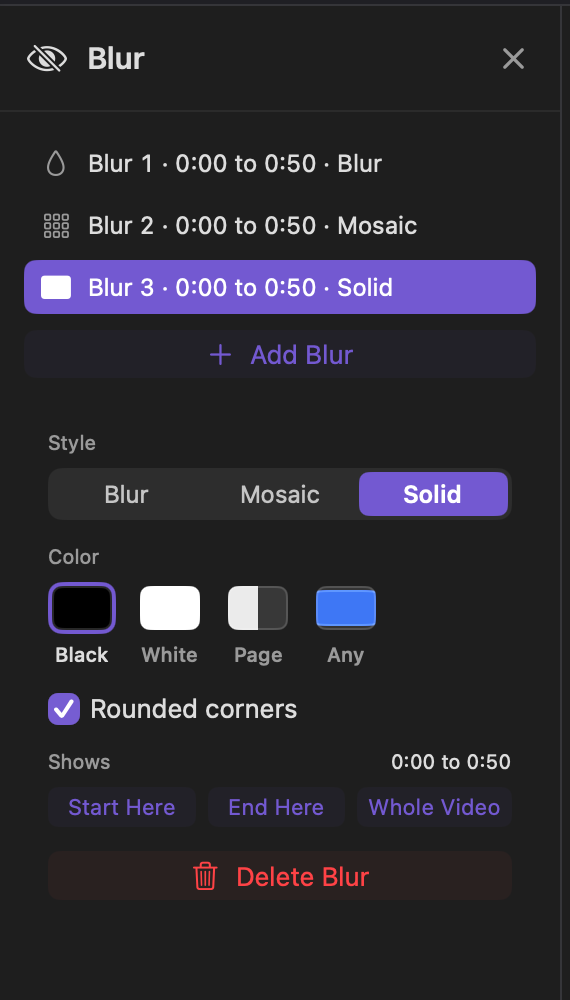
Solid
Color: Black, White, Page or Any.
Black is the default. Page fills the box with the average color of the area it covers, worked out on every frame. Any opens the color picker.
Hiding something sensitive
Every style is drawn into the exported video, so the original pixels are not in the file. Blur and Mosaic keep a soft impression of the colors and shapes; turn up the strength or block size to hide more. Solid covers the area with one flat color.
Rounded corners is on by default. Turn it off to cover a rectangle right to its corners. The outline on the video always shows exactly the area that gets hidden.
While you drag the Strength or Block size slider, the preview follows it. The change is saved when you let go.
Set the time on the Blur lane
- The Blur lane is the row labeled Blur, under Zoom. It shows on the Blur page, with one block per blur.
- Click a block to select it. If the playhead is outside the blur, it jumps to the blur's start.
- Drag the middle of a block to move the blur in time. Select it, then drag the small handle at either end to change its start or end.
- Right-click a block for Start Here, End Here, Whole Video, the three styles and Delete Blur.
- Blurs that overlap in time stack in the lane, one above the other.
- Clicking an empty part of the lane only moves the playhead. Blurs are added on the video.
Start Here starts the blur at the beginning of the frame on screen, not just at the playhead, and End Here ends it where that frame gives way to the next. A screen that sat still for a few seconds is covered from its first frame.
Find, change and delete blurs
The panel lists every blur, like Blur 1 · 0:00 to 4:12 · Blur. Click a row to select that blur and move the playhead into it.
To delete the selected blur, click Delete Blur in the panel, press ⌫, use Delete Blur in the play bar, or right-click its block on the lane. Press Esc to let go of the selection.
Every change is one undo step. Press ⌘Z to undo and ⇧⌘Z to redo. If you undo a blur change from another tool, the editor takes you back to the Blur page with that blur selected.
What stays hidden
- Zooms, layouts, crop and Vertical. They all work with the picture that's already hidden.
- Cuts and speed changes. A blur keeps to the moment in the recording it covers.
- The preview, the timeline thumbnails, the Trim view and the still shown while you export.
- Share links. A link's video is made by the same export, so it carries your blurs.
- Video exports, GIF exports and Save This Frame (right-click the video).
- If a Blur or Mosaic effect can't be drawn, the area is covered with Solid instead of being shown.
If it doesn't work
The video says "The screen isn't shown here"
That part shows only your camera. Blurs go on your screen recording, so move the playhead to where your screen is visible.
The Blur panel is greyed out
Blurs can't be changed while the project is still opening, while you export, or while you adjust the crop. Wait for it to finish, or finish adjusting the crop first.
A row says "In removed time"
That blur sits entirely in a part you deleted, so it never shows in your video. A blur keeps to the moment in the recording it covers, so it comes back if you bring that part back.
The preview isn't zoomed on this page
That's on purpose: zooms stay off on the Blur page so you can see the whole screen. Switch to another tool and the zooms come back, with the blurs still in place.
Tips
- Blurs belong to the recording you draw them on. They aren't saved in a Look.
- See every Blur page shortcut in the editor's keyboard shortcuts list: drag to add, ⌫ to remove, Esc to let go.
- CursorClip is free to record and edit, and you need a license to export. See Export your video. For what Blur looks like, see the Blur feature page.